How do you take a first step towards a more creative life?
Create a vision board. Fill it with your intention, your wishes, and your vision for your future.
Making a v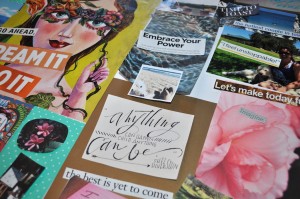 ision board is a simple, inexpensive and creative way to manifest what you’re looking to do. A vision board can jump-start your creativity if you’re feeling stuck, and help you find your flow once you get unstuck.
Before I leaped wholeheartedly into creative living—about 8 months before I actually quit my full-time job—I made a vision board about Courage versus Comfort. I knew that in order to make these dramatic changes in my life, I would need to step outside of my comfort zone and into a courageous state. Looking at it every day helped me to think about what was next, instead of stewing in misery over my current situation. It was a visual reminder you can keep nearby to remind you of your intention as you start on your creative path.
So let’s get started.
-
Set the Scene
Before you get started, get comfy and set up your work space. I like to clear my dining room table of all clutter so I have a big, flat, clean space to work on. (Hint: Things may get messy, so be sure to cover your work space with something you don’t mind getting wrecked.)
Next, I put on some music that inspires me (could be mellow or energetic, depending on what I’m creating) and focus on my vision. Take some notes or do some brainstorming to spark your creativity: when you envision your future, what do you see? What do you want to manifest or bring into your life?
-
Hunt for Inspiration
Now that you have a theme for your vision board, go forth and gather inspiration. Cut, rip and tear up old magazines, books, postcards or anything you can get your hands on that has words or images that inspire you and fit your theme. I like to keep a stash of catalogs, magazines and mailers that I can go through for these very occasions. You can also search and print out images from Flickr or Google Images.
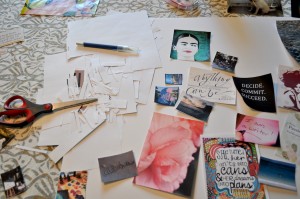
You don’t have to know what you’re going to do with all these pieces at this point, but you do need to keep your intention in mind here. Choose images and phrases that support your vision. Try to get a good mix of background images you like and words that stand out to you. You want plenty to choose from here, so more is more.
-
Make it Personal
I like to add extra stuff to my vision board that is unique to me, like photos, mementos, and even inspiring quotes or images I’ve saved in Pinterest. For your photos, you can either print out thumbnails or regular-sized images from your computer, or send them to your nearest 1-hour photo. I like Target or Costco’s Photo Centers; for both, you can submit your files online and pick them up in-store in an hour or two.
-
Gather Your Supplies
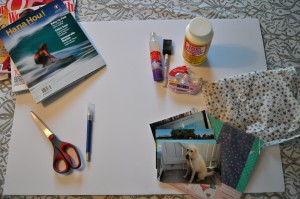 I prefer white foam core for my support; it’s a little thicker than poster board and I can lean it up against any wall when I’m done. You can also use a sheet of recycled cardboard, or a thin piece of wood—anything substantial enough to support all the gluing you’ll be doing. Speaking of which, you’ll need some glue, or Mod Podge or double-stick tape. Or maybe a combination of all. Keep your scissors handy too because you may need to trim those images even more.
 -
Lay it All Out
Take a deep breath. Remember your vision? Okay, here’s where it comes to life and you get to play. I like to choose a central image or quote that embodies
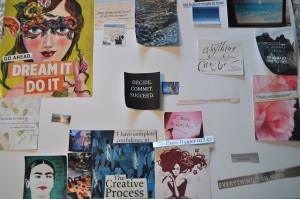 what my theme is. For my Courage vision board, it was an image of a lion with “ROAR” written over it; for this one, I really liked two items: the Decide Commit Succeed image and the larger illustration of the botanical girl.
Put the glue down! We’re not there yet. You’re just going to crank up the music, remember your vision, and start placing things where they make sense to you. Nothing is final—you’re just playing here. Take things on and off, move them around, and see if you get any themes within your theme going. You don’t have to use everything you clipped either; keep what’s left for your next project.
-
Mind the Gaps
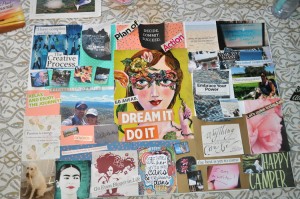
I ended up using the Botanical Girl illustration as my centerpiece because I really fell in love with her. Once you have everything laid out in a way you like, take a giant step back. Are there any gaps that need filling, either visually or thematically? If so, you may want to go back to your inspiration pile and see if anything else fits. Personally I don’t like having a ton of white space or gaps on my boards, so I keep some patterned scrapbook paper around that I can place behind other images to smooth everything out.
-
Make it Stick
Are you loving it? If so, you’re ready for that glue. Here’s what I like to do: I start with my central image and glue that down first, because everything else is kind of dependent on that. And then I’ll usually secure my corners because I know they’re not likely to move. And then you can just kind of take one little section off at a time and glue it back down. I recommend leaving your corners unglued so that you can tuck and layer other stuff in there. When you’re completely done, go back around and check to make sure no edges are sticking up and everything is secure.
That’s all there is to it! Now go ahead and tackle that future.
